Simple single-file PHP script for combining JS / CSS assets

Combining Assets

One of the basic tenets of making a web-page load quickly is reducing the number of HTTP requests that your page makes. One very common way of doing this, is assuring that all of your CSS files are combined into one request (ideally in the <head> tag), and all of your javscript files are combined into one request (ideally at the bottom of the <body> tag).

The Solution

I’ve worked with several large sites which each had their own solutions, but recently I found myself needing to speed up a fairly simple site: Burndown for Trello.

To make things simple (and so that I’d never have to write this again), I made a StaticResources system which will allow me to put just one PHP script into the root directory of the site, and use a few simple calls to add files to the header or footer of the page. The script requires no setup, installation, or configuration to run correctly. However, it has some optional advanced settings (which we’ll discuss at the end).

Usage

Usage is very simple. Just make a call to add files to the system, so that they’re included in the header or footer. Both local and external files are added with the same kind of call.

StaticResources::addHeaderFile("css/GoogleWebfont_Tauri_Latin.css");

StaticResources::addFooterFile("jquery-ui.js");
StaticResources::addFooterFile("http://code.jquery.com/ui/1.9.1/jquery-ui.js");

After you’ve added the files, make sure that somewhere in your code you print the HTML which will contain all of the files that were added

// put this at the bottom of the HEAD tag
print StaticResources::getHeaderHtml();

// put this at the bottom of the BODY tag
print StaticResources::getFooterHtml();

Here’s an example file of how you’d include a bunch of JS / CSS using this StaticResources system. It obviously won’t work if you don’t create JS/CSS files in the locations referenced, but this is very simple code to show the system in action.

<?php

include 'static.php';

// You can add header files any time before the StaticResources::getHeaderHtml() call.
StaticResources::addHeaderFile("css/GoogleWebfont_Tauri_Latin.css");

// You can add footer files any time before the StaticResources::getHeaderHtml() call.
StaticResources::addFooterFile("jquery-1.9.1.js");

// For files that won't change (like a specific version of jQuery), it's often better to host it on your
// own server instead of making a separate HTTP request to the CDN.
StaticResources::addFooterFile("jquery-ui.js");

?><!DOCTYPE html> 
<html>
	<head>
		<meta http-equiv="Content-Type" content="text/html; charset=UTF-8">
		<title>StaticResources example page
		<?php

		// You can add header files any time before the StaticResources::getHeaderHtml() call.
		StaticResources::addHeaderFile("jquery-ui.min.css");
		
		// A good place to output the HTML is right at the end of the HEAD tag.
		// getHeaderHtml() returns a string (to be more flexible with various PHP frameworks)
		// so be sure to print its result.
		print StaticResources::getHeaderHtml();
		?>
	
	<body>
		<header>
			Created for <a href='https://burndownfortrello.com'>Burndown for Trello.
		</header>

		<article>
			<h1>StaticResources example page

<p>This page is an example of loading static resources in combined files.

</article> <footer> © 2013 – Sean Colombo </footer> <?php // For files that won’t be changing StaticResources::addFooterFile(“stripeIntegration.js”); // To add a file from another site, just make sure to use the full URL. // Since there is no file extension, we have to pass in the filetype as a second parameter. StaticResources::addFooterFile(“https://www.google.com/jsapi”, “js”); // Output the footerHtml at the bottom of the page. It doesn’t have to be in the FOOTER tag, it should // be done as far down on the page as possible (close to the end of the BODY tag). print StaticResources::getFooterHtml(); ?> </body> </html>

The Code

Without further delay, this is the code of static.php that you should put in the main (eg: public_html) directory of your app.

\n";

		$html .= $this->myGetHtmlForArray( $this->_headerFilesByType );
		
		// Add the remote resources that were explicitly told to load AFTER the combined local file (by default, remote
		// files will be in the _headerFilesByType array and have been outputted before the combined local file).
		$html .= $this->myGetHtmlForArray( $this->_lateHeaderFilesByType );

		$_headerAlreadyReturned = true;
		return $html;
	} // end getHeaderHtml()

	/**
	 * Returns a string which contains the HTML that's needed to
	 * import the files at the bottom of the BODY tag.  This should be called exactly
	 * once (and it's results should be printed at the bottom of the  tag - right
	 * before ) on every page.
	 */
	public function myGetFooterHtml(){
		$html = "\n" . $this->myGetHtmlForArray( $this->_footerFilesByType );
		$_footerAlreadyReturned = true;
		return $html;
	} // end getFooterHtml()

	/**
	 * Given an associative array of static resources whose keys are
	 * resource types and whose values are arrays of fileNames (local
	 * and/or remote), this will return a string which contains the
	 * HTML that's needed to import those files.
	 *
	 * NOTE: External files are always imported before the combined
	 * local-file if they are in the same array. To avoid this, use parameters
	 * to addHeaderFile() that specify addRemoteAfterLocalFiles=true and the
	 * external file will be put into an entirely separate array.
	 */
	public function myGetHtmlForArray($filesByType){
		global $staticPhp_cacheBuster;
		$html = "";

		// The URL of this script (which will act as an endpoint and serve up the actual content.
		$url = $this->staticResourcesRootUrl . basename(__FILE__);
		foreach($filesByType as $fileType => $files){
			$localFiles = array();

			// Include all external files first (way more likely that local files depend on remote than vice-versa).
			foreach($files as $fileName){
				if(StaticResources::isRemoteFile($fileName)){
					// Add the HTML for including the remote file.
					if($fileType == "css"){
						$html .= "		\n";
					} else if($fileType == "js"){
						$html .= "		\n";
					} else {
						// Each file type needs to be included a certain way, and we don't recognize this fileType.
						$errorString = sprintf(self::ERR_CANT_OUTPUT_FILETYPE, htmlentities($fileType));
						trigger_error($errorString, E_USER_WARNING);
					}
				} else {
					$localFiles[] = $fileName;
				}
			}

			// Output the HTML which makes the request for the combined-file of all local files of the same fileType.
			if(count($localFiles) > 0){
			
				// TODO: TWEAK SO THAT THE DELIMITER ISN'T URL-ENCODED. MAKES IT MORE READABLE AND SHORTER.
				// TODO: TWEAK SO THAT THE DELIMITER ISN'T URL-ENCODED. MAKES IT MORE READABLE AND SHORTER.

				$fullUrl = $url . "?fileType={$fileType}&files=".rawurlencode( implode(STATICRESOURCES_FILE_DELIMITER, $localFiles) );
				$fullUrl .= (empty($staticPhp_cacheBuster)? "" : "?cb=$staticPhp_cacheBuster");

				if($fileType == "css"){
					$html .= "		\n";
				} else if($fileType == "js"){
					$html .= "		\n";
				} else {
					// Each file type needs to be included a certain way, and we don't recognize this fileType.
					$errorString = sprintf(self::ERR_CANT_OUTPUT_FILETYPE, htmlentities($fileType));
					trigger_error($errorString, E_USER_WARNING);
				}
			}
		}

		return $html;
	} // end myGetHtmlForArray()

	/**
	 * Returns true if the given fileName is allowed to be included, false otherwise.
	 * The reason a file may not be allowed is that it's of the wrong file-type. One
	 * reason for this is that we don't want attackers to request file types that may
	 * contain password-files or source code that some users of this script might not
	 * want to make public, etc..
	 */
	private function fileIsAllowed($fileName){
		$fileIsAllowed = true;
		if( !StaticResources::isRemoteFile($fileName)){
			$fileExtension = strtolower( StaticResources::getFileExtension($fileName) );
			$fileIsAllowed = in_array($fileExtension, self::$ALLOWED_FILE_TYPES);
		}
		return $fileIsAllowed;
	} // end fileIsAllowed()

	/**
	 * Returns true if the fileName is from another site and false if it is from this site.
	 */
	public static function isRemoteFile($fileName){
		// If it starts with a protocol (ftp://, http://, https://, etc.) then it is remote (not local).
		return (0 <  preg_match("/^[a-z0-9]+:\/\//i", $fileName));
	}

	/**
	 * If the 'fileName' is a local file, this will return that fileName in such a way
	 * that the fileName can be loaded from disk safely (without allowing the user to
	 * jump out of the current directory with "../" or absolute directories such
	 * as "/usr/bin/").
	 *
	 * WARNING: THIS SANITIZES IT AS A FILE-PATH BUT DOES NOT DO htmlentities()
	 * OR ANYTHING SIMILAR, SO IT DOES NOT SANITIZE FOR PRINTING INTO THE PAGE.
	 */
	public static function sanitizeFileName($fileName){
		// Only local files need to be sanitized.
		if( !StaticResources::isRemoteFile($fileName)){
			// Make sure the user can't get above the current directory using "../".
			while(strpos($fileName, "../") !== false){
				$fileName = str_replace("../", "", $fileName);
			}
			
			// Starting out with current directory avoids abusing absolute paths such as "/usr/bin"
			if(strpos($fileName, "./") !== 0){ // if path already starts with ./, don't duplicate it.
				if(strpos($fileName, "/") === 0){ // path already starts with "/", just turn it into "./".
					$fileName = ".$fileName";
				} else {
					$fileName = "./$fileName"; // all other paths that start 'normally' (not "./" or "/").
				}
			}
		}

		return $fileName;
	}

	////
	// Returns the file extension (without the leading "."). Example: "php".
	////
	public static function getFileExtension($fileName){
		// If there is a query-string, chop that off before looking for the extension.
		if(strpos($fileName, "?") !== false){ // getting the FIRST question-mark to prevent any shenannigans.
			$fileName = substr($fileName, 0, strpos($fileName, "?"));
		}
	
		return pathinfo($fileName, PATHINFO_EXTENSION);
	}


	// ----- STATIC HELPERS -----
	/**
	 * Gets a singleton object of the StaticResources type to make it easy for the
	 * script to use StaticResources throughout the web-app without passing the object
	 * around.  This is probably the most common use-case.
	 */
	public static function getSingleton(){
		global $staticResourcesSingleton;
		if(empty($staticResourcesSingleton)){
			$staticResourcesSingleton = new StaticResources();
		}
		return $staticResourcesSingleton;
	} // end getSingleton()
	
	public static function addHeaderFile($fileName, $fileType="", $addRemoteAfterLocalFiles=false, $warnIfLateAdded=true){
		$singleton = StaticResources::getSingleton();
		$singleton->myAddHeaderFile($fileName, $fileType, $addRemoteAfterLocalFiles, $warnIfLateAdded);
	}
	public static function addFooterFile($fileName, $fileType="", $warnIfLateAdded=true){
		$singleton = StaticResources::getSingleton();
		$singleton->myAddFooterFile($fileName, $fileType, $warnIfLateAdded);
	}
	public static function getHeaderHtml(){
		$singleton = StaticResources::getSingleton();
		return $singleton->myGetHeaderHtml();
	}
	public static function getFooterHtml(){
		$singleton = StaticResources::getSingleton();
		return $singleton->myGetFooterHtml();
	}
	public static function setRootUrl( $rootUrl ){
		$singleton = StaticResources::getSingleton();
		$singleton->mySetRootUrl($rootUrl);
	}
	/**
	 * Given an array of filetype -> (array of files) combos, will get the HTML for this file. This
	 * is NOT recommended in most uses, you should only be getting HTML from getHeaderHtml()
	 * and getFooterHtml() when possible. This is to allow you flexibility to break the rules
	 * if needed. For example: if you want to output a specific local file above the remote files
	 * and NOT bundled with the other local files (due to dependencies) then you can accomplish this.
	 */
	public static function getHtmlForArray( $fileArray ){
		$singleton = StaticResources::getSingleton();
		return $singleton->myGetHtmlForArray($fileArray);
	}

} // end class StaticResources

Using this script with a CDN

One drawback of serving a combined file is that your server has to read in all of the files, then print them all. This makes the call slightly slower than it has to be. One solution is to use a CDN to cache the files on your site. This way, even if it takes your server a second or so to generate the file the first time, it can be served to the next user instantly, from the CDN.

For Burndown for Trello, we use Fastly as our CDN (disclosure: my fiance works there, but we use it because it’s free for one backend and it’s crazy fast).

The code to make this work with a CDN is very simple: one extra line below the include call:

include 'static.php';
StaticResources::setRootUrl("http://b4t.global.ssl.fastly.net/");

Code minification

Another common performance trick is to use a minifier to reduce file-size. This hasn’t been added to the script yet, but may come in the future. If you have a favorite minifier, I’ve conspicuously commented in the code where it would make sense to run the minifier.

Minification takes a little while to run, so it’s highly recommended that you get a CDN if you’re using minificaiton.

The End

Hope you found the script useful. If you use it on your site, please link to it in the comments!
Thanks,
– Sean Colombo

Burndown for Trello gets flame decals!

Not literally… but we made the site faster! Our app that makes burndown charts for Trello has received a number of improvements in the past couple of weeks. A couple of days ago, we made the AJAX requests take about 1/7th of the time that they took previously. The enormous Trello board that we used for testing went from taking 14 seconds to load, to taking 1 to 2 seconds.

The changes that we made only took a couple of hours, so I figured I’d share a few quick tips so that you can get a Pareto-style improvement in your backend-performance too.

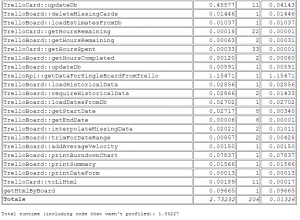
We started with a simple open source PHP profiler that I released a few years ago. The only catch is that our slow request was an AJAX call… so I added a small javascript function that can be used to wrap AJAX urls, so that the URL parameter for profiling gets passed to those calls to.

/**
 * Makes the URL profilable by the same system as the pages:
 * if profling was enabled via URL param on this run, adds the param to the URL.
 */
function profilable(url){
	if(getURLParameter('RUN_PROFILER')){
		var delim = ((url.indexOf("?") === -1) ? "?" : "&");
		url += delim + "RUN_PROFILER=" + getURLParameter('RUN_PROFILER');
	}
	return url;
}
// From http://stackoverflow.com/a/8764051/684852
function getURLParameter(name) {
	return decodeURIComponent((new RegExp('[?|&]' + name + '=' + '([^&;]+?)(&|#|;|$)').exec(location.search)||[,""])[1].replace(/\+/g, '%20'))||null;
}

Then anytime that you make an ajax call, just wrap the URL in “profilable()” like this:

$.post(profilable("./myAjaxEndpoint.php"), { someVar: 'someValue' }, callbackFunction, "json").error(errorHandler);

That will pass the RUN_PROFILER=true url params to the ajax endpoint. The other half of the equation is to make sure the profiling info comes back in the ajax request. As you will see from the a original post about the profiler, to get the profiling output as HTML, just call profiler_printResults() somewhere that is safe to output HTML. If the profiling isn’t enabled (eg: by the URL parameters), there will be no output.

Fortunately our ‘ajax’ is not using XML, but rather JSON which contains some HTML… so we just called profiler_printResults() right in our AJAX endpoint and the HTML in the result gets injected into the page along with the rest of the result.

To see the profiling in action, hit this URL:

https://BurndownForTrello.com/?RUN_PROFILER=true

php_profiler_outputThe initial page is very light (all of the heavy lifting is done by asynchronous javascript), so there is only a small table on the first request. Once you “Connect to Trello” and then view one of your trello boards, there will be quite a bit of detail below your board’s info. Just remember that the “Totals” row is the sum of all items, and since many functions are nested inside of each other, there will be a lot of double-counting… the actual time for the backend request is what comes after “Total runtime” below the table of data.

It took only a couple of hours to pull in the open source PHP profiler, add the _begin/_end hooks to our code, write the javascript code to pass the variable along to the backend, and then actually use the profiling output to identify some easy-win hotspots and get an 85% reduction in runtime for that request.

I hope it has a similar return-on-investment for you! 🙂

“Burndown for Trello” now has a Pro version

About a year ago, we started building a scrum-like burndown tool for Trello to help us manage our own projects. After a few months of work, we made it so that anyone could sign up for the free burndown charts for Trello.

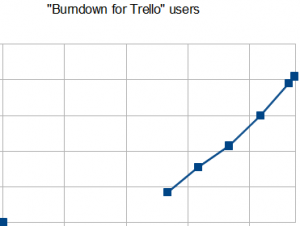
dat exponential growth

Burndown for Trello – exponential user growth

We thought that a decent number of people would find it useful, but we didn’t count on it growing as fast as it did! We started getting a lot of requests for additional features. Since we were busy releasing Hive for Xbox 360, it was hard to find time to add new things. Our solution was to create a paid account, so we can spend more time on this project which it seems there is a huge demand for.

We want to do-right by our existing free users, so here are the basics:

  • The free account will remain free and will have all of the features it has today.
  • Anyone who signed up before the paid account was created is an “Early Adopter” and is eligible for a perpetual discount on the paid version (look for Early Adopter in the dropdown that lets you pick a plan).

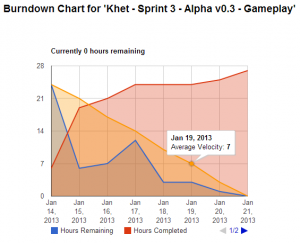
At some point since the last blog-post, we added the average-velocity line which was requested by users.

At some point since the last blog-post, we added the average-velocity line which was requested by users.

There were some other changes that we made in the process of creating this paid account:

  • The name is now “Burndown for Trello”. We were told by someone at Trello that ‘Trello Burndown’ might create trademark issues.
  • The app is no longer just in a folder on BlueLine’s site… it’s at its own domain now: http://BurndownForTrello.com
  • All requests are now sent over https, so your company’s data is always encrypted.

We’ll be adding more and more to the paid account, but here are the main reasons to upgrade:

  1. Support us! More paid accounts == more time for us to make new features!
  2. Automatic daily updates of stats – even if you don’t visit the site in a given day, if you have a paid account we’ll pull the data from the Trello API for each board and store the stats. Until now, if you didn’t view a board in a specific day, then the next time you view that board, we just extrapolated (averaged) the data across all of the missing days.
  3. All new features will be added to the paid accounts. Free users get the app as it is now (with only minor upgrades, like site redesigns, bug fixes and global changes like adding https). All of the big stuff coming up is paid-only.
  4. MORE SOON! – We’ve had a ton of suggestions, and we’re hoping to add many cool features. Next up, we’re hoping to let you put your estimates in the titles of Trello cards, so you don’t have to visit Burndown for Trello to update your estimates.
  5. Update: March 8th, 2013 – we just finished & rolled out integration with the “Scrum for Trello” Chrome extension. This means that you can put estimates in the titles of the cards in parentheses like this: (2) whether you have the extension or not. If you do this, Burndown for Trello will automatically pull in the estimate. This was hands-down our most requested feature up to this point.

If you want to get all of the new features as we add them, head over to Burndown for Trello and click on the upgrade button!

Announcing our next game: Khet 2.0 for Xbox 360!

Khet 2.0
Keeping up with the exciting pace of this year so far… we have an awesome announcement to make:

BlueLine Game Studios has been given an exclusive license to bring the extremely popular Khet 2.0 board game to Xbox!

Khet 2.0 is an Egyptian-themed two-player game with real lasers. It has been growing in popularity world-wide, and has a successful iPhone/iPad version.

The game is already well into development, and we are using the same board game engine that we wrote while making Hive for Xbox. The Xbox version of Khet 2.0 is planned to have single-player (against AI), local multiplayer, pass-n-play (if you only have one controller), online multiplayer, full 3D graphics & camera-control, a global highscores list… and frickin’ lasers!

If you want to be notified when the game goes into Alpha/Beta testing or for the final release, please sign up for the BlueLine Games “Release Announcements” mailing list.

New game: Hive for Xbox 360!

After more than 15 months of work, many nights of play-testing by our devoted Alpha team, and close to a kiddie-pool worth of Mountain Dew… it’s finally here!

Hive for Xbox 360!

Hive screenshot

When you think you’re starting to get good, add me on Xbox Live – “SeanColombo” – and I’ll gladly play a round with you!

If you have any questions, suggestions, or feedback… please leave them in the comments below!

Konami Code in XNA – for Windows, Xbox, and Windows Phone (WP7)

The Konami Code is a fun part of gaming culture and a very common method for adding Easter Eggs to games. After more than a year of work on Hive, I started thinking how absurd it was that we don’t have any Easter Eggs yet. When I went to look for a module for the Konami Code in XNA (because: how could there NOT be one?!), I found that the only solution currently out there seemed to be Charles Cox’s Konami Code for WP7.

At the time of this writing, BlueLine doesn’t make any WP7 games though: just Xbox 360 games that we hope to release to PC soon. To avoid completely reinventing the wheel, and to make sure my solution would be backward compatible to anyone already using Charles Cox’s module for WP7, I decided to just piggyback on that code. I’ll send my code back to him too, so hopefully he can add it to the version on his site. I’ll also structure this post to be very similar to his post so it can be merged more easily.

The solution is a single class file that you can drop into any XNA project, and by adding a small snippet of code to your update routine, you can have Konami Code functionality in minutes.

C# – KonamiCode.cs

using System;
using System.Collections.Generic;
using System.Linq;
using System.Text;
using Microsoft.Xna.Framework;
using Microsoft.Xna.Framework.Audio;
using Microsoft.Xna.Framework.Content;
using Microsoft.Xna.Framework.GamerServices;
using Microsoft.Xna.Framework.Graphics;
using Microsoft.Xna.Framework.Input;
#if WINDOWS_PHONE
using Microsoft.Xna.Framework.Input.Touch;
#endif
using Microsoft.Xna.Framework.Media;

namespace KonamiCodeXna
{

    // A delegate type that represents the code has either been entered right or wrong
    public delegate void CodeEnteredEventHandler(object sender, KonamiCodeEventArgs e);

    public class KonamiCodeEventArgs : EventArgs
    {
        /// <summary>
        /// The player index that entered the code.
        /// WARNING: This can be null (eg: on WP7, or when the code was entered using the keyboard).
        /// </summary>
        public PlayerIndex? PlayerIndex { get; private set; }

        public KonamiCodeEventArgs(PlayerIndex? playerIndex)
            :base()
        {
            this.PlayerIndex = playerIndex;
        }
    }

    /// <summary>
    /// Class for easily using the KonamiCode in XNA apps (Windows, Windows Phone, and Xbox).
    /// 
    /// Originally written for Windows Phone 7 by Charles N. Cox.
    /// Expanded to work on Xbox and Windows by Sean Colombo.
    /// </summary>
    public class KonamiCode
    {
        public event CodeEnteredEventHandler CodeEnteredRight;
        public event CodeEnteredEventHandler CodeEnteredWrong;

        // Track the progress by each PlayerIndex. If playerIndex is irrelevant, just key off of "null" instead.
        private Dictionary<PlayerIndex, int> numCorrectByPlayerIndex;
        private int numCorrectKeyboard;

        // To be able to tell when buttons are pressed/released, these vars will keep track of state from previous tick.
        private Dictionary<PlayerIndex, GamePadState> previousGamePadStateByPlayerIndex;
        private KeyboardState previousKeyState;

        public KonamiCode()
        {
            numCorrectKeyboard = 0;
            numCorrectByPlayerIndex = new Dictionary<PlayerIndex, int>();
            previousGamePadStateByPlayerIndex = new Dictionary<PlayerIndex, GamePadState>();
        }

#if WINDOWS_PHONE
        enum DirType
        {
            DirTypeUp,
            DirTypeDown,
            DirTypeLeft,
            DirTypeRight
        };

        private DirType[] correctSequence = new DirType[8] {
            DirType.DirTypeUp,
            DirType.DirTypeUp,
            DirType.DirTypeDown,
            DirType.DirTypeDown,
            DirType.DirTypeLeft,
            DirType.DirTypeRight,
            DirType.DirTypeLeft,
            DirType.DirTypeRight };

        public void checkGesture(GestureSample gs)
        {
            bool rightCode = true;
 
            switch(correctSequence[numCorrect])
            {
                case DirType.DirTypeUp:
                    if (gs.Delta.Y > 0 || (Math.Abs(gs.Delta.Y) < Math.Abs(gs.Delta.X)))
                        rightCode = false;
                    break;
                case DirType.DirTypeDown:
                    if (gs.Delta.Y < 0 || (Math.Abs(gs.Delta.Y) < Math.Abs(gs.Delta.X)))
                         rightCode = false;
                    break;
                case DirType.DirTypeRight:
                    if (gs.Delta.X < 0 || (Math.Abs(gs.Delta.Y) > Math.Abs(gs.Delta.X)))
                        rightCode = false;
                    break;
                case DirType.DirTypeLeft:
                    if (gs.Delta.X > 0 || (Math.Abs(gs.Delta.Y) > Math.Abs(gs.Delta.X)))
                        rightCode = false;
                    break;
            }

            this.RecordSuccessByPlayerIndex(rightCode, null);
        }
#else
        private Keys[] correctKeySequence = new Keys[]{ // for the keyboard
            Keys.Up,
            Keys.Up,
            Keys.Down,
            Keys.Down,
            Keys.Left,
            Keys.Right,
            Keys.Left,
            Keys.Right,
            Keys.B,
            Keys.A
        };

        private Buttons[] correctButtonSequence = new Buttons[]{ // for gamepads
            Buttons.DPadUp,
            Buttons.DPadUp,
            Buttons.DPadDown,
            Buttons.DPadDown,
            Buttons.DPadLeft,
            Buttons.DPadRight,
            Buttons.DPadLeft,
            Buttons.DPadRight,
            Buttons.B,
            Buttons.A,
        };
        private List<Buttons> buttonsToCheck; // which buttons to check for being up/down each tick. For performance reasons, we'll only check the buttons that are part of the sequence.

        /// <summary>
        /// Should be called once each update loop when listening for the code.
        /// </summary>
        public void checkKeyboard()
        {
            bool rightCode = false;
            KeyboardState keyboardState = Keyboard.GetState();

            // Only evaluate the state if SOMETHING was pressed (we only care about the sequence, not that they're IMMEDIATELY after each other).
            if (WasAnyKeyPressed(keyboardState))
            {
                if (WasKeyPressed(correctKeySequence[numCorrectKeyboard], keyboardState))
                {
                    rightCode = true;
                }

                this.RecordSuccessByPlayerIndex(rightCode, null);
            }

            previousKeyState = keyboardState;
        }

        /// <summary>
        /// Should be called once each update loop when listening for the code, for each playerINdex
        /// that is being listened to (will track their progress separately so that their keypresses
        /// don't interfere with each other).
        /// </summary>
        /// <param name="playerIndex"></param>
        public void checkPlayerIndex(PlayerIndex playerIndex)
        {
            bool rightCode = false;

            int numCorrectSoFar = 0; // the number-correct-so-far corresponds to the index in the sequence that should be expected
            if (numCorrectByPlayerIndex.ContainsKey(playerIndex))
            {
                numCorrectSoFar = numCorrectByPlayerIndex[playerIndex];
            }

            // This is called once per tick, then re-used by the other functions below.
            GamePadState currentGamePadState = GamePad.GetState(playerIndex);

            // Only evaluate the state if SOMETHING was pressed (we only care about the sequence, not that they're IMMEDIATELY after each other).
            if (IsAnyButtonPressed(playerIndex, currentGamePadState))
            {
                if (WasButtonPressed(correctButtonSequence[numCorrectSoFar], playerIndex, currentGamePadState))
                {
                    rightCode = true;
                }

                this.RecordSuccessByPlayerIndex(rightCode, playerIndex);
            }

            previousGamePadStateByPlayerIndex[playerIndex] = currentGamePadState;
        }

        /// <summary>
        /// Returns true if any key is currently pressed down, false otherwise.
        /// 
        /// If a user presses a key and holds it down, this method will return
        /// true every time it's called while that key is held down.
        /// </summary>
        /// <returns></returns>
        //public bool IsAnyKeyDown(KeyboardState keyboardState)
        //{
        //    Keys[] keys = keyboardState.GetPressedKeys();

        //    // Some systems return an empty array when nothing is pressed, some return one item containing Keys.None
        //    bool nothingPressed = ((keys.Length == 0) || ((keys.Length == 1) && (keys[0] == Keys.None)));
        //    return (!nothingPressed);
        //}

        /// <summary>
        /// Returns true if any key was JUST pressed, false otherwise.
        /// 
        /// This means that if a key is pressed and held down, the first
        /// tick will return true and subsequent ticks will return false even while
        /// the key is still being held down.
        /// </summary>
        /// <returns></returns>
        public bool WasAnyKeyPressed(KeyboardState keyboardState)
        {
            Keys[] keys = keyboardState.GetPressedKeys();

            bool somethingNewIsPressed = false;

            // Some systems return an empty array when nothing is pressed, some return one item containing Keys.None
            bool nothingPressed = ((keys.Length == 0) || ((keys.Length == 1) && (keys[0] == Keys.None)));
            if (!nothingPressed)
            {
                IEnumerable<Keys> newlyPressed = keys.Except(previousKeyState.GetPressedKeys()); // ignore keys that were already down on the previous tick.
                somethingNewIsPressed = (newlyPressed.Count() > 0);
            }

            return somethingNewIsPressed;
        }

        private bool WasKeyPressed(Keys keyToCheck, KeyboardState keyboardState)
        {
            return (previousKeyState.IsKeyUp(keyToCheck) && keyboardState.IsKeyDown(keyToCheck));
        }

        /// <summary>
        /// Returns true if any of the buttons RELEVANT TO THE KONAMI CODE were pressed. For performance, does not
        /// check all buttons each tick, just checks the buttons that appear in the correctButtonSequence.
        /// </summary>
        /// <param name="playerIndex"></param>
        /// <param name="currentGamePadState"></param>
        /// <returns></returns>
        private bool IsAnyButtonPressed(PlayerIndex playerIndex, GamePadState currentGamePadState)
        {
            bool somethingPressed = false;

            if (buttonsToCheck == null)
            {
                // Not all users will have my (Sean's) Set<> class, so abuse a Dictionary instead.
                Dictionary<Buttons, bool> buttonSet = new Dictionary<Buttons, bool>();
                foreach (Buttons button in correctButtonSequence)
                {
                    buttonSet[button] = false; // the bool is trash basically. this is just a cheap way to implement a set.
                }
                buttonsToCheck = buttonSet.Keys.ToList();
            }

            foreach (Buttons button in buttonsToCheck)
            {
                somethingPressed = (somethingPressed || WasButtonPressed(button, playerIndex, currentGamePadState));

                if (somethingPressed)
                {
                    break;
                }
            }

            return somethingPressed;
        }

        private bool WasButtonPressed(Buttons button, PlayerIndex playerIndex, GamePadState currentGamePadState)
        {
            bool wasPressed;
            if(previousGamePadStateByPlayerIndex.ContainsKey(playerIndex)){
                wasPressed = (previousGamePadStateByPlayerIndex[playerIndex].IsButtonUp(button) && currentGamePadState.IsButtonDown(button));
            } else {
                wasPressed = currentGamePadState.IsButtonDown(button);
            }
            return wasPressed;
        }
#endif

        /// <summary>
        /// Records a successful/unsuccessful keypress by PlayerIndex. In cases where the
        /// PlayerIndex is irrelevant (often, on WP7 there is only one player), then null
        /// can be used.
        /// 
        /// NOTE: This method is typically called from other helpers such as checkGesture
        /// and checkGamePadHelper instead of being called directly.
        /// </summary>
        /// <param name="rightCode"></param>
        /// <param name="playerIndex"></param>
        public void RecordSuccessByPlayerIndex(bool rightCode, PlayerIndex? playerIndex)
        {
            if (rightCode)
            {
                // PlayerIndex is null for keyboard and non-null for game pads.
                if (playerIndex == null)
                {
                    numCorrectKeyboard++;
                    if(numCorrectKeyboard >= correctKeySequence.Length)
                    {
                        //reset the code, fire the event
                        numCorrectKeyboard = 0;
                        KonamiCodeEventArgs args = new KonamiCodeEventArgs(playerIndex);
                        CodeEnteredRight.Invoke(this, args);
                    }
                }
                else
                {
                    if (numCorrectByPlayerIndex.ContainsKey((PlayerIndex)playerIndex))
                    {
                        numCorrectByPlayerIndex[(PlayerIndex)playerIndex]++;
                    }
                    else
                    {
                        numCorrectByPlayerIndex[(PlayerIndex)playerIndex] = 1;
                    }

                    if (numCorrectByPlayerIndex[(PlayerIndex)playerIndex] >= correctButtonSequence.Length)
                    {
                        //reset the code, fire the event
                        numCorrectByPlayerIndex[(PlayerIndex)playerIndex] = 0;
                        KonamiCodeEventArgs args = new KonamiCodeEventArgs(playerIndex);
                        CodeEnteredRight.Invoke(this, args);
                    }
                }
            }
            else
            {
                //wrong type, reset the count, send event
                if (playerIndex == null)
                {
                    numCorrectKeyboard = 0;
                }
                else
                {
                    numCorrectByPlayerIndex[(PlayerIndex)playerIndex] = 0;
                }
                KonamiCodeEventArgs args = new KonamiCodeEventArgs(playerIndex);
                CodeEnteredWrong.Invoke(this, args);
            }
        }

    }
}

To Use the Class

It’s really just three things:

  1. Instantiate a KonamiCode object.
  2. Subscribe to the CodeEnteredRight event (and, if you want, the CodeEnteredWrong event)
  3. Update it once, each game-tick (ie: in Update()).

Getting it Into a Default Project

To mirror the example given in Charles’ original post, I’ll show how to use this module in an example project to have the same outcome that his original code did, but have it also work on Windows and Xbox 360 (in addition to WP7).

Game1

//**Start Code For This Sample - REPLACE YOUR GAME1 CONSTRUCTOR WITH THIS
KonamiCode konami = new KonamiCode();
Color clearColor = Color.CornflowerBlue;
 
public Game1()
{
    graphics = new GraphicsDeviceManager(this);
    Content.RootDirectory = "Content";
 
    // Frame rate is 30 fps by default for Windows Phone.
    TargetElapsedTime = TimeSpan.FromTicks(333333);
 
    konami.CodeEnteredRight += new CodeEnteredEventHandler(konami_CodeEnteredRight);
    konami.CodeEnteredWrong += new CodeEnteredEventHandler(konami_CodeEnteredWrong);
 
    TouchPanel.EnabledGestures = GestureType.Flick;
 
}
 
void konami_CodeEnteredWrong(object sender, EventArgs e)
{
    clearColor = Color.Tomato;
}
 
void konami_CodeEnteredRight(object sender, EventArgs e)
{
    clearColor = Color.MediumSeaGreen;
}
//**End Code For This Sample

Update

//**Start Code For This Sample - REPLACE YOUR UPDATE LOOP WITH THIS
protected override void Update(GameTime gameTime)
{
    // Allows the game to exit
    if (GamePad.GetState(PlayerIndex.One).Buttons.Back == ButtonState.Pressed)
        this.Exit();
 
    #region Konami code updating
#if WINDOWS_PHONE
	while (TouchPanel.IsGestureAvailable)
	{
		GestureSample gs = TouchPanel.ReadGesture();
		konamiCode.checkGesture(gs);
	}
#else // WINDOWS || XBOX
	// Need to check the code for each game pad that's in-use.
	foreach (PlayerIndex playerIndex in new PlayerIndex[] { PlayerIndex.One, PlayerIndex.Two, PlayerIndex.Three, PlayerIndex.Four })
	{
		if (GamePad.GetState(playerIndex).IsConnected)
		{
			konamiCode.checkPlayerIndex(playerIndex);
		}
	}

	// Then check the code for the keyboard (if there is one, there will be just one so it's checked separately, not per-player).
	konamiCode.checkKeyboard();
#endif
	#endregion

    base.Update(gameTime);
}
//**End Code For This Sample

Draw

//**Start Code For This Sample - REPLACE YOUR DRAW METHOD WITH THIS
protected override void Draw(GameTime gameTime)
{
    GraphicsDevice.Clear(clearColor);
 
    // TODO: Add your drawing code here
 
    base.Draw(gameTime);
}
//**End Code For This Sample

If you run into any issues, please let us know.

Games using this Konami code class

If you put this into a game, let us know when it’s out! We’ll add it to this list of XNA games that have Konami Code built in, using this class.

DrawString() to fit text to a Rectangle in XNA

It seems that there are a number of implementations of fitting several lines of text (of a specific size) into a rectangle and wrapping them (we wrote one too), but I was surprised that SpriteBatch.DrawString() did not have a form which does the more simple task of just taking a string and making it grow/shrink to fill a rectangle.

Desired Effects

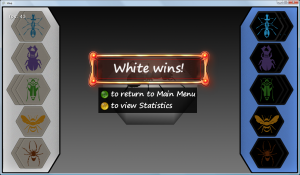
White wins!What I wanted to accomplish, was to take a (probably short) arbitrary string and make it as big as possible while fitting inside of a certain box on the screen. Specifically, I wanted to show who won in the Game Over screen for Hive.

So we specified a rectangle (shown in red around the text) and made the text change its size to fit in the box without wrapping, regardless of what that text might be.

The Code

I put this static method into a utility class I used a bunch:

        /// 
        /// Draws the given string as large as possible inside the boundaries Rectangle without going
        /// outside of it.  This is accomplished by scaling the string (since the SpriteFont has a specific
        /// size).
        /// 
        /// If the string is not a perfect match inside of the boundaries (which it would rarely be), then
        /// the string will be absolutely-centered inside of the boundaries.
        /// 
        /// 
        /// 
        /// 
        static public void DrawString(RelativeSpriteBatch spriteBatch, SpriteFont font, string strToDraw, Rectangle boundaries)
        {
            Vector2 size = font.MeasureString(strToDraw);

            float xScale = (boundaries.Width / size.X);
            float yScale = (boundaries.Height / size.Y);

            // Taking the smaller scaling value will result in the text always fitting in the boundaires.
            float scale = Math.Min(xScale, yScale);

            // Figure out the location to absolutely-center it in the boundaries rectangle.
            int strWidth = (int)Math.Round(size.X * scale);
            int strHeight = (int)Math.Round(size.Y * scale);
            Vector2 position = new Vector2();
            position.X = (((boundaries.Width - strWidth) / 2) + boundaries.X);
            position.Y = (((boundaries.Height - strHeight) / 2) + boundaries.Y);

            // A bunch of settings where we just want to use reasonable defaults.
            float rotation = 0.0f;
            Vector2 spriteOrigin = new Vector2(0, 0);
            float spriteLayer = 0.0f; // all the way in the front
            SpriteEffects spriteEffects = new SpriteEffects();

            // Draw the string to the sprite batch!
            spriteBatch.DrawString(font, strToDraw, position, Color.White, rotation, spriteOrigin, scale, spriteEffects, spriteLayer);
        } // end DrawString()

Usage looks something like this:

        RelativeSpriteBatch batch;
        SpriteFont font;
        // ...
        Rectangle outcomeBoundaries = new Rectangle(100,100,500,500); // 500x500 rectangle with top left at (100, 100)
        string outcomeString = "White always wins!"; // 1984 reference 😉
        MotiveUtil.DrawString(batch, font, outcomeString, outcomeBoundaries);

The Results

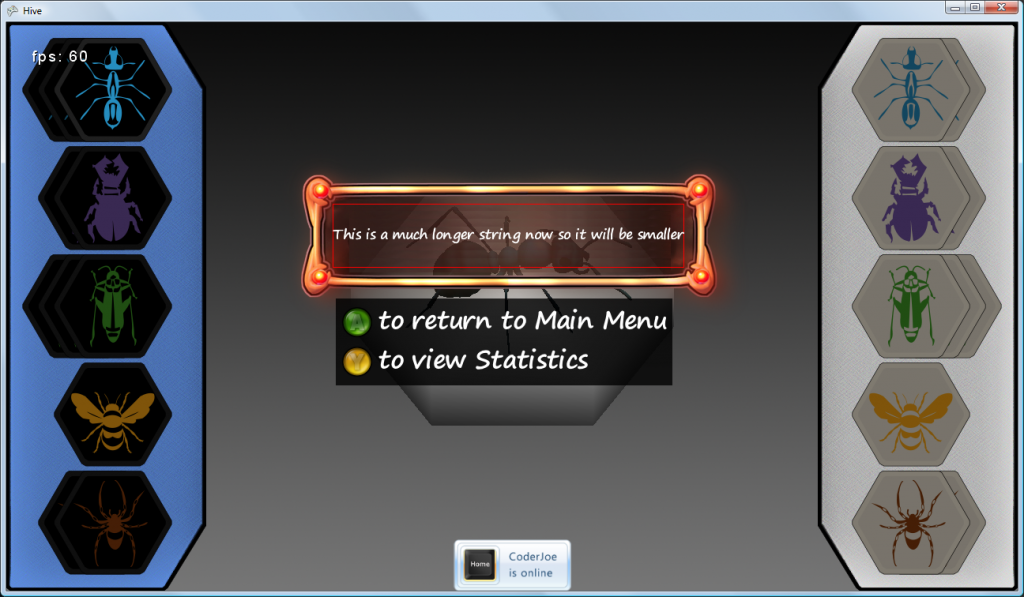
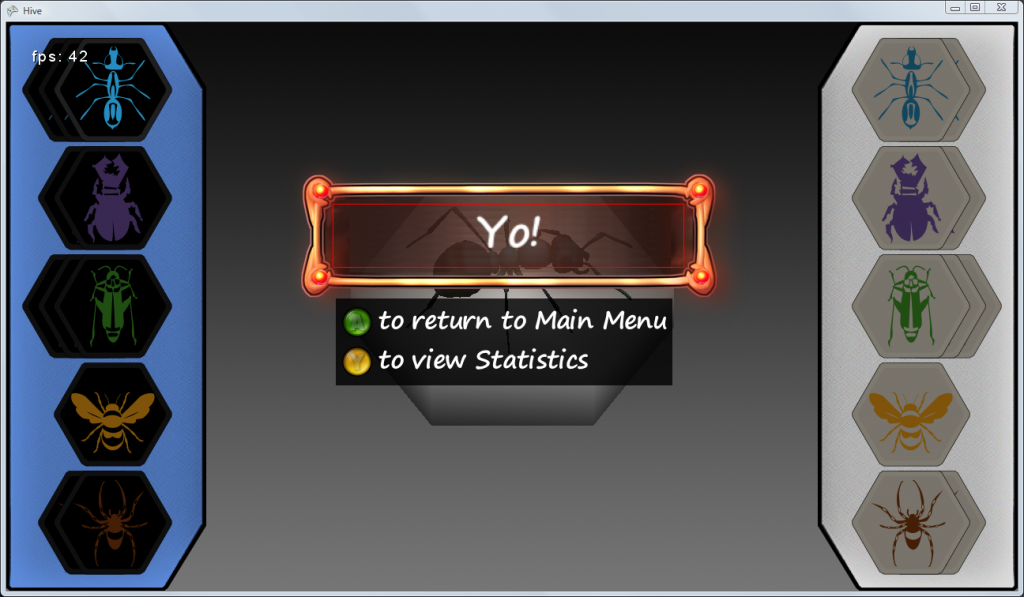
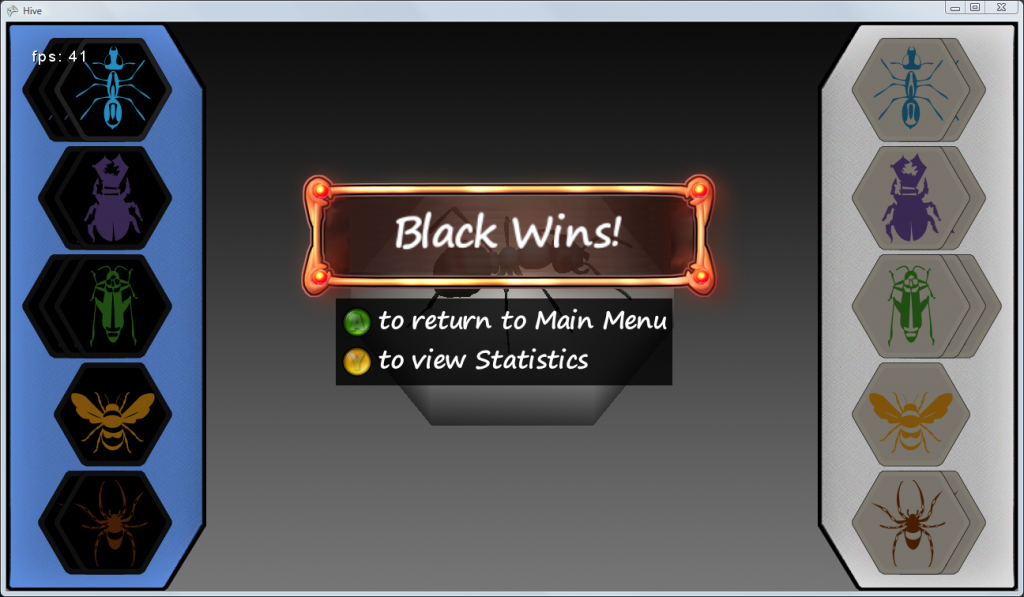
Here’s how it handles some other inputs to try to fill the rectangle as much as possible without overflowing. The red box showing the boundaries is just for demonstration, it was removed from the last picture so you could see what this is actually meant to look like.

Drawing a hollow rectangle border in XNA 4.0

For some reason, there wasn’t much info on this. For the sake of making this faster for others, I’ll post code for a quick way to draw a rectangular outline in XNA 4.0. If you’re planning on doing a ton of 2D drawing, you might be better served by this tutorial on drawing polygons. I’d actually recommend defining some geometry classes if you go that far though.

The basic trick to drawing shapes is to make a single-pixel texture which is White, which you can then mix with other colors and display in solid shapes.

// At the top of your class:
Texture2D pixel;

// Somewhere in your LoadContent() method:
pixel = new Texture2D(GameBase.GraphicsDevice, 1, 1, false, SurfaceFormat.Color);
pixel.SetData(new[] { Color.White }); // so that we can draw whatever color we want on top of it

Then in your Draw() method do something like:

spriteBatch.Begin();

// Create any rectangle you want. Here we'll use the TitleSafeArea for fun.
Rectangle titleSafeRectangle = GraphicsDevice.Viewport.TitleSafeArea;

// Call our method (also defined in this blog-post)
DrawBorder(titleSafeRectangle, 5, Color.Red);

spriteBatch.End();

And the actual method that does the drawing:

        /// <summary>
        /// Will draw a border (hollow rectangle) of the given 'thicknessOfBorder' (in pixels)
        /// of the specified color.
        ///
        /// By Sean Colombo, from http://bluelinegamestudios.com/blog
        /// </summary>
        /// <param name="rectangleToDraw"></param>
        /// <param name="thicknessOfBorder"></param>
        private void DrawBorder(Rectangle rectangleToDraw, int thicknessOfBorder, Color borderColor)
        {
            // Draw top line
            spriteBatch.Draw(pixel, new Rectangle(rectangleToDraw.X, rectangleToDraw.Y, rectangleToDraw.Width, thicknessOfBorder), borderColor);
            
            // Draw left line
            spriteBatch.Draw(pixel, new Rectangle(rectangleToDraw.X, rectangleToDraw.Y, thicknessOfBorder, rectangleToDraw.Height), borderColor);

            // Draw right line
            spriteBatch.Draw(pixel, new Rectangle((rectangleToDraw.X + rectangleToDraw.Width - thicknessOfBorder),
                                            rectangleToDraw.Y,
                                            thicknessOfBorder,
                                            rectangleToDraw.Height), borderColor);
            // Draw bottom line
            spriteBatch.Draw(pixel, new Rectangle(rectangleToDraw.X,
                                            rectangleToDraw.Y + rectangleToDraw.Height - thicknessOfBorder,
                                            rectangleToDraw.Width,
                                            thicknessOfBorder), borderColor);
        }

Hope that saves someone some time! 🙂

Trello Burndown is open source!

Recently, we made one of our internal tools publicly available: Burndown charts for Trello. It’s been surprisingly successful: all we did was blog about it and there are about 100 users who have logged in already!

Since the little app seems to be gaining popularity, we figured that now would be a good time to open up the source-code so that others can either help improve it, or just use it to learn about the Trello API.

Here are the important links:

If you have improvements to contribute, please let us know! 🙂